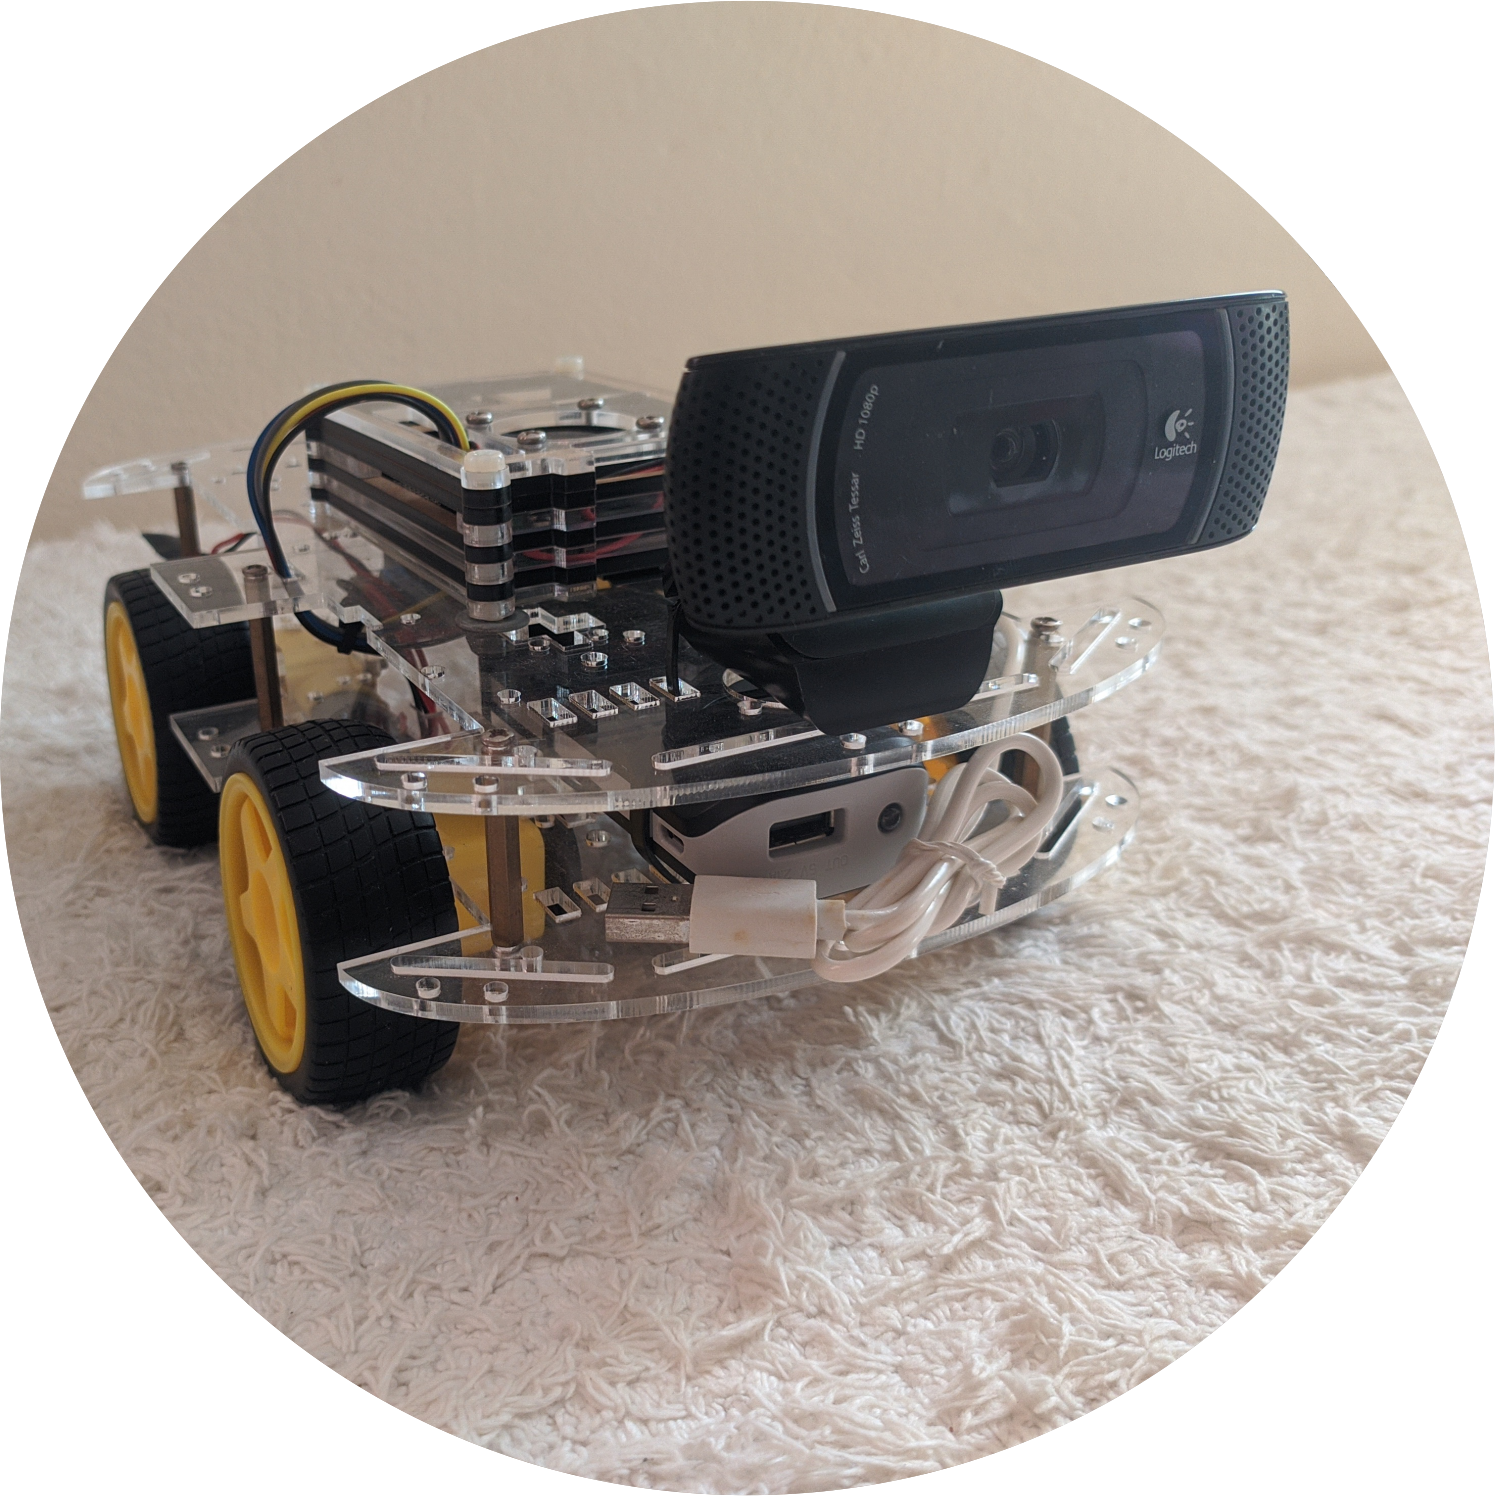
I developed this robot to test mobile robotics concepts, and also to house a vision system that I was developing for my undergraduate project. This robot is simple to assemble and also has a very low cost, which makes the project easy to access for people who want to start in robotics. At the time that I built this robot, I still didn’t have any knowledge about ROS, however, sometime later I performed tests using this framework.
Hardware
Materials
| Item | Quantity |
|---|---|
| Raspberry Pi 3 | 1 |
| Micro SDCard 32Gb | 1 |
| Power Supply 5V | 1 |
| Acrylic base | 2 |
| Motor DC | 4 |
| Wheels | 4 |
| H Bridge L298N | 1 |
| Male-Female Jumper | 1 |
| Female-Male Jumper | 4 |
| Fan for Raspberry Pi | 1 |
| Heatsink for Raspberry Pi | 1 |
| 4 AA battery connector | 1 |
| Rechargeable AA batteries | 4 |
| Power Bank 5000 Ah 5V 2.1A | 1 |
| Logitech C910 Webcam | 1 |
Assembly
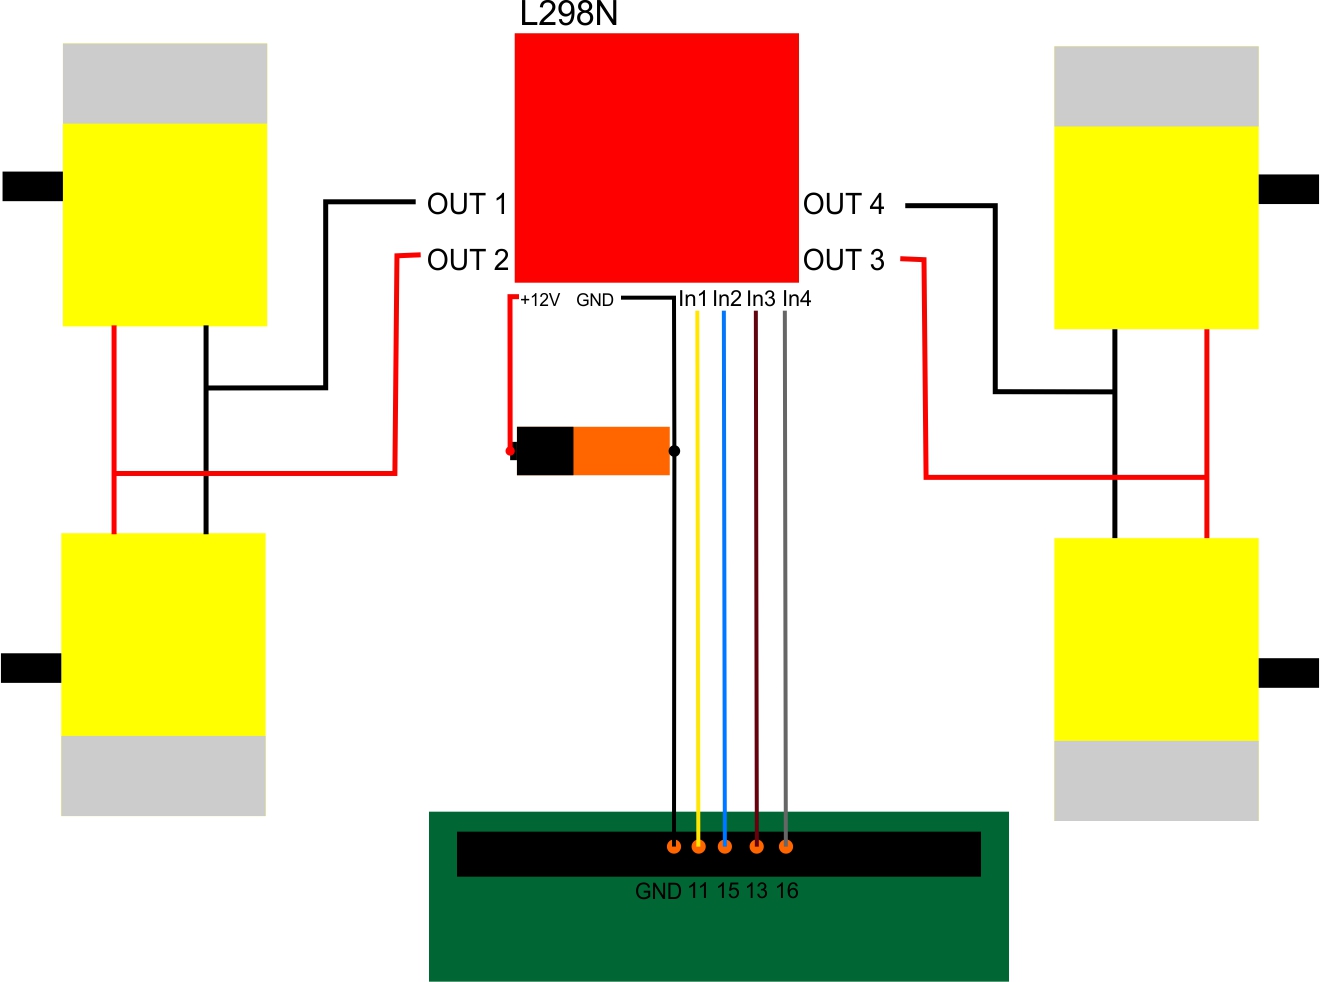
The first step in assembling the hardware is to fit the motors and wheels onto the acrylic base. The wiring diagram shows how the assembly is done so that the front and rear wheels are joined together to function as just two wheels, left and right.
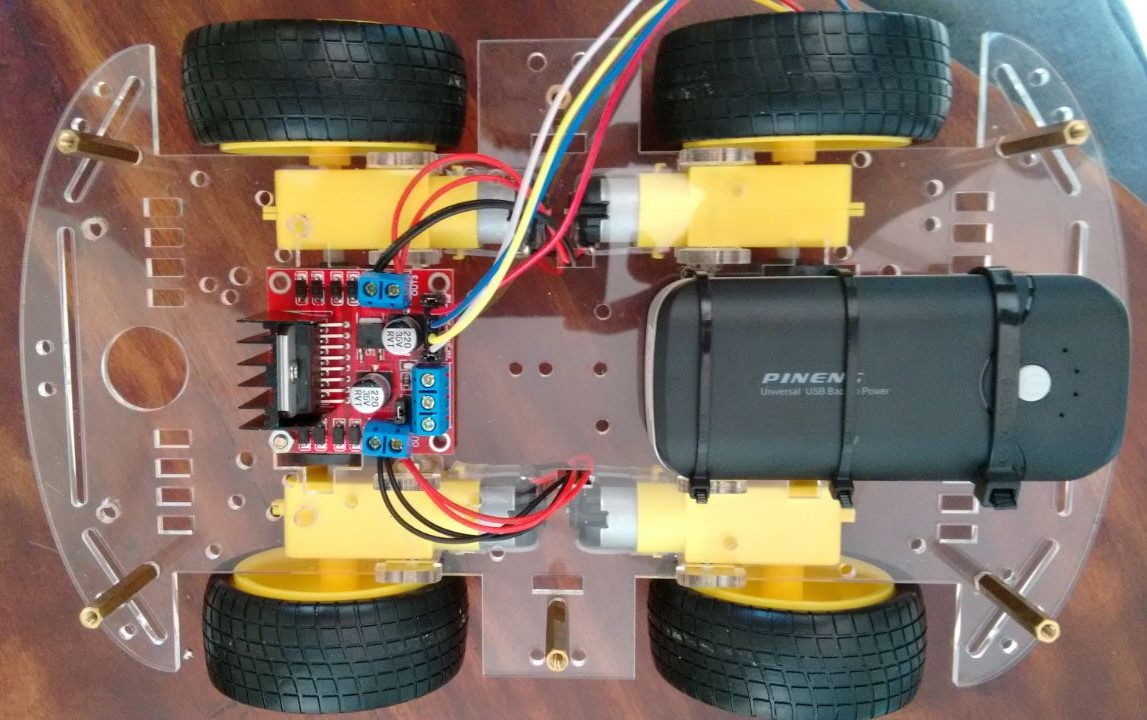
The next step is to perform the connection of the motors in the H bridge L298N. Next is to connect the L298N H-Bridge to the Raspberry Pi3 ports and connect the rechargeable AA batteries that will supply power to run the motors as shown in the figure.
To prevent heating on the part of the Raspberry Pi3, an exhaust fan and heat sinks had to be used. The heatsink connection was made on the +5V and GND pins of the board.
After finishing the wiring using jumpers, the mechanical assembly of the robot is done. The MicroSD Card and the Powerbank are connected, respectively to store the software and supply power to the Raspberry Pi3.
The C910 camera is connected to the Raspberry Pi3 via one of the USB roads.
Software
Navigation
Because it is a system controlled by remote access, I used an HTTP server, as well as a web page so that the robot could move and thus generate the images for the computer. With the help of the Micro Framework Flask, I created a control page hosted by apache that can be accessed by any device connected to the same network as the robot through its IP. To do this I followed a tutorial from a [course I had taken at the time].(https://www.udemy.com/course/aprenda-a-programar-raspberry-pi-construindo-um-robo/), since I didn’t know the ROS yet.
Vision system
The software for the System was developed using the Python programming language, with the help of the OpenCV computer vision library. The operation of the program is to display the image captured by the camera and in real-time display information about the environment, at the same time performing image treatments to extract the best visual quality. Important data is also added to the video screen, such as date, time, etc, check it out below.
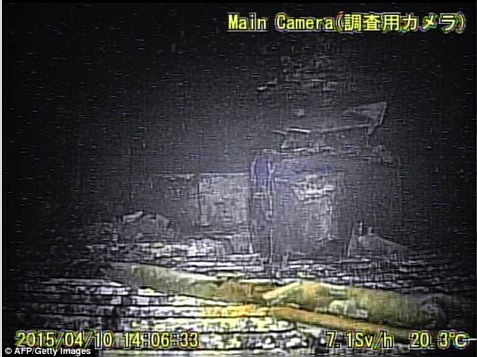
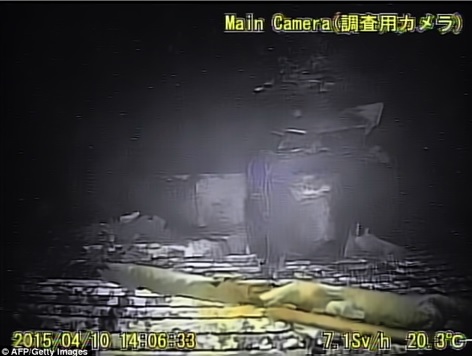
At the time I developed this code in Python, I was studying robotics in nuclear crisis environments, the goal was to generate a vision system that would remove the noise from the images captured in these environments. I used the same program algorithm to treat the image below. The original was taken from the archives of the nuclear power plant in Fukushima, Japan.
ROS tests
As I mentioned before, I did tests using ROS as soon as I found out about it. This testing was done before I took the robotics specialization course so only basic concepts were applied: movement through a program made in Python and Qt, and vision using OpenCV.